System configuration and advanced settings
The work is complete when administrators have configured only the areas the organisation uses, verified them with a representative account, and handed off every active, not-applicable, or specialist-owned item.
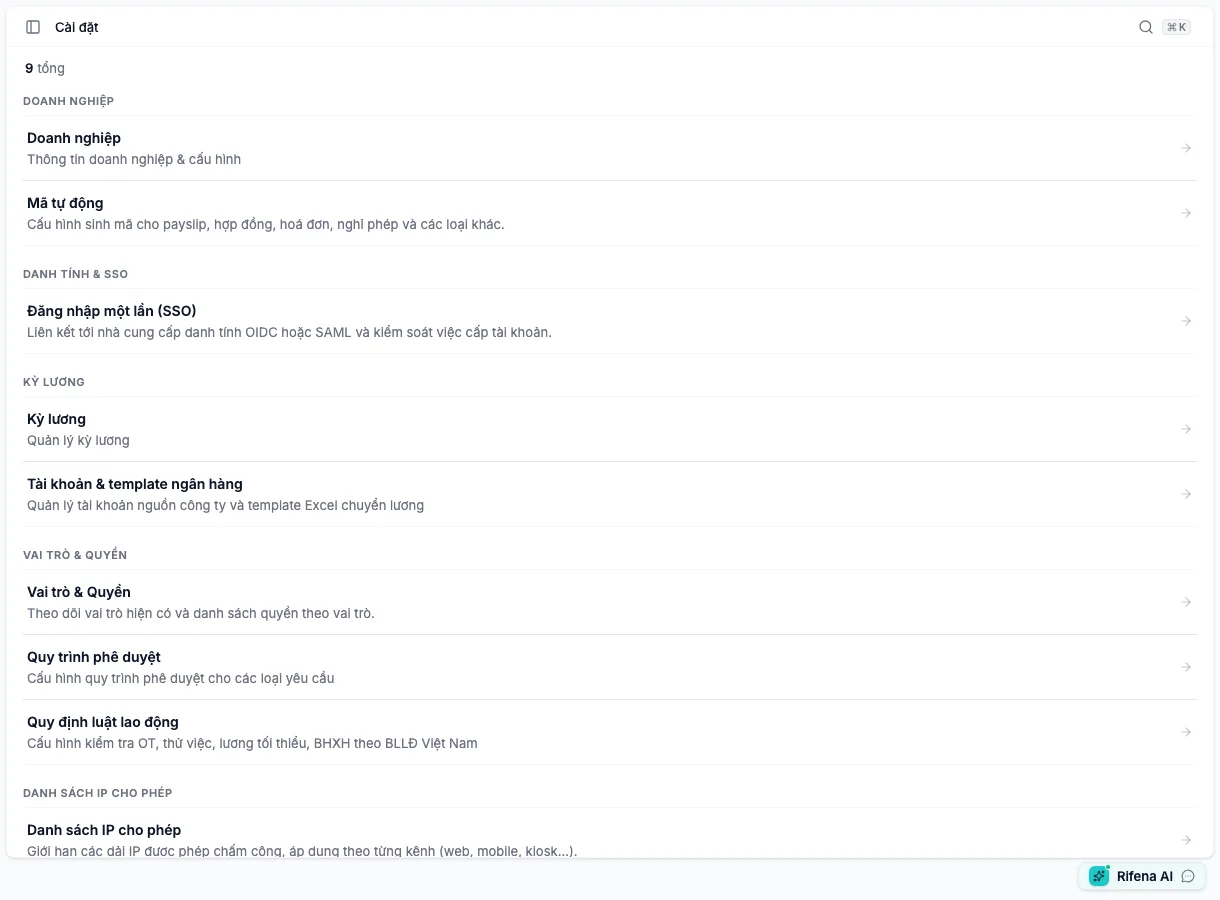
Current Settings map
Open /settings. The page lists only the areas available to the account; a
missing card does not by itself mean the feature was removed.
| Visible area | Product route | Purpose |
|---|---|---|
| Organization | /settings/tenant |
Name, logo, timezone, language, and payroll region |
| Roles & Permissions | /settings/roles |
Roles, effective permissions, and data scope |
| Approval workflows | /settings/workflows |
Approval steps and decision owners |
| Payroll periods | /settings/periods |
Period generation, attendance close/reopen, and payroll coordination |
| Labor law rules | /settings/labor-rules |
Apply statutory rules in Warn or Block mode |
| Auto codes | /settings/sequences |
Patterns and counters for new records |
| Allowed IP ranges | /settings/ip-allowlist |
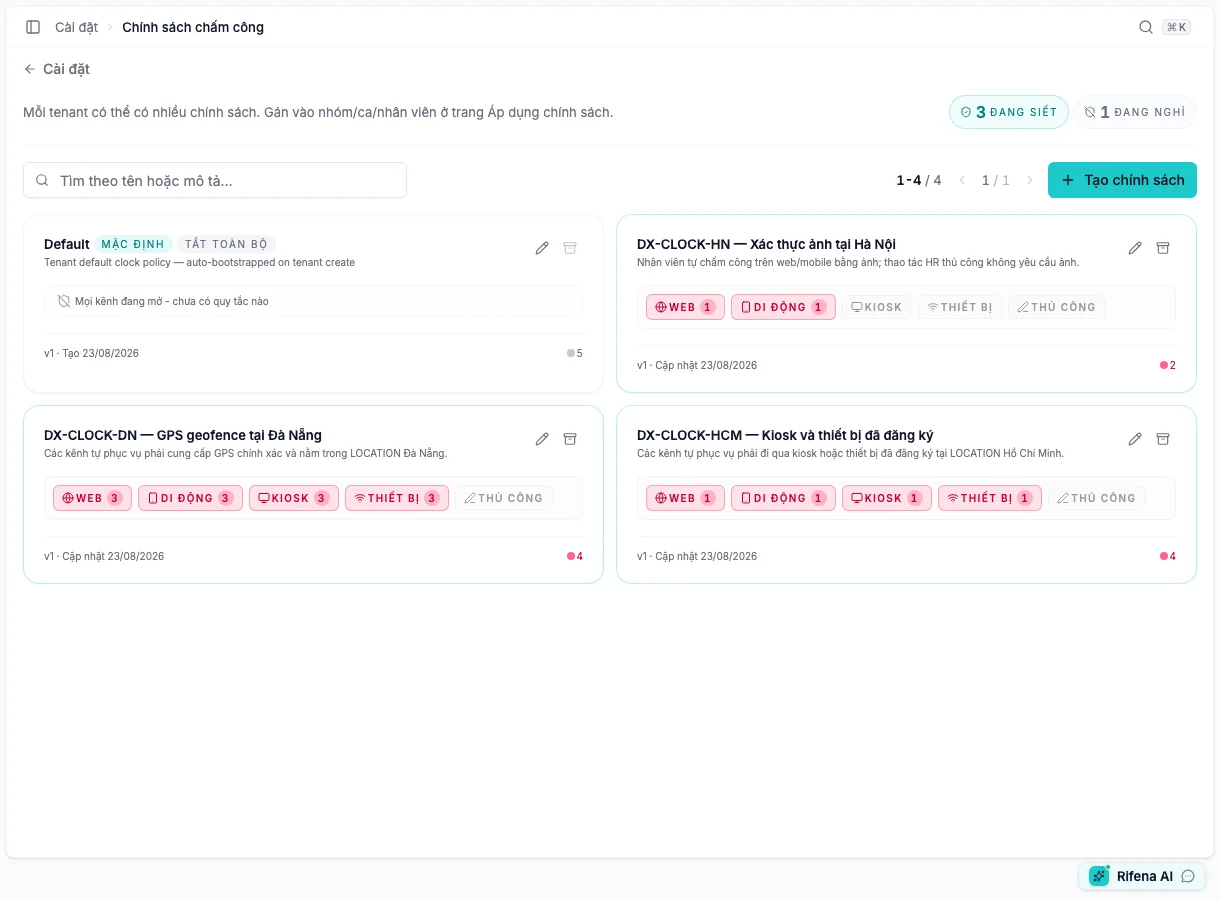
Network ranges used by attendance checks |
| Single sign-on (SSO) | /settings/sso |
Identity configuration; it does not prove a connector is active |
| Bank accounts & templates | /settings/bank-templates |
Source accounts, spreadsheet mapping, and transfer preview |
Recommended configuration order
1. Confirm Organization
Review the display name, timezone, language, and payroll region before creating date-effective data. A wrong timezone makes effective dates, attendance, and reporting difficult to reconcile.
Expected result: the organisation details remain correct after reload, and later work uses the same context.
2. Bound access before expanding configuration
In Roles & Permissions:
- select the role to review;
- keep only the view, create, edit, delete, or approval actions the job needs;
- confirm company, group, or selected-person scope;
- save, refresh the representative account’s session, and open the target page;
- confirm out-of-scope areas remain hidden or denied.
Do not use one tenant-wide administrator to prove a manager or employee journey.
3. Complete Approval workflows
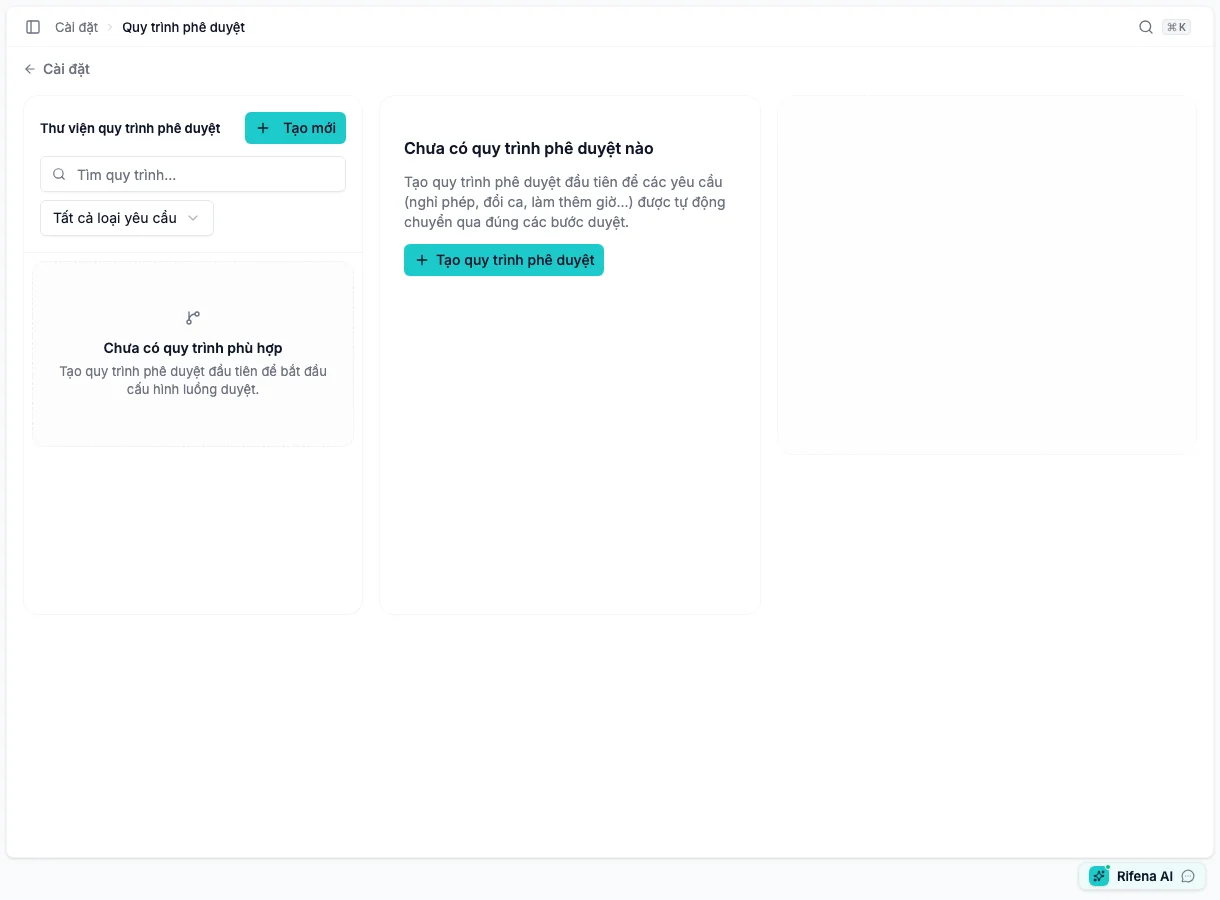
Create or open the definition for leave, overtime, or the business request in scope. Each step needs an approver source, conditions, and overdue handling. Resolve every readiness error before activation, then submit one safe test request and confirm the intended decision owner receives it.
4. Prepare Payroll periods
Review the cycle type, dates, and automatic generation. Attendance starts in Attendance open and must reach Attendance closed before a payroll run can use the period. Reopen only after assessing affected payroll runs.
5. Apply Labor law rules
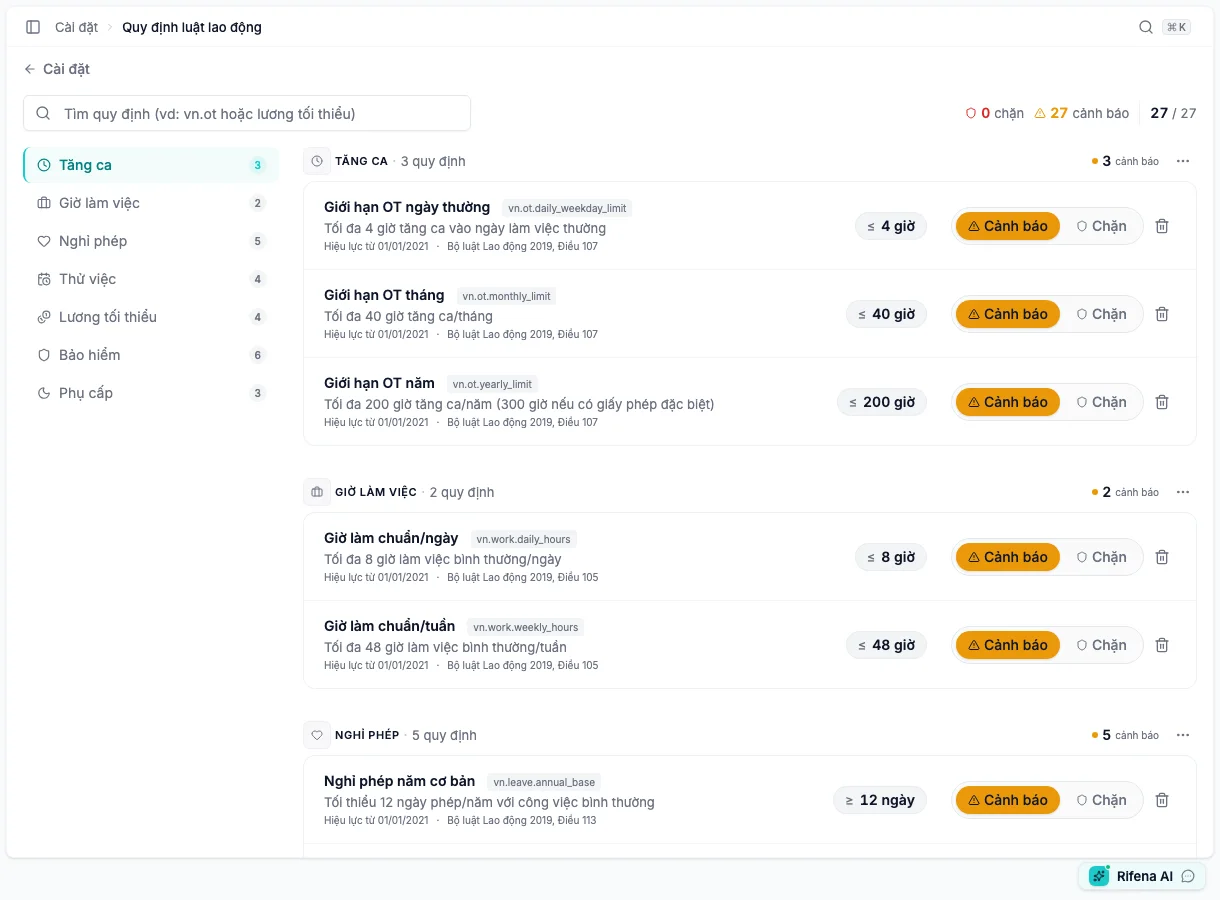
Current overtime limits live here, not on an OT policies screen. Review the source, effective date, and scope before moving a rule from Warn to Block. Test one representative record before broad application.
6. Standardise Auto codes
Review each record type, pattern, and next-code preview before saving. A counter reset requires a reason and a next value that cannot duplicate an issued record. Do not delete history to force the counter backwards.
7. Bound networks for attendance events
In Allowed IP ranges, enter a network-verified CIDR and select Web, Mobile, Kiosk, Device, or Manual sources. Selecting no source means all sources. This list participates in an attendance check only when the effective policy requires IP; it does not protect sign-in or the whole administration area.
8. Keep SSO fail-safe
Single sign-on (SSO) separates an external provider used to enter Rifena from internal applications that accept Rifena accounts. The current screen can store configuration but explicitly states that the external sign-in connector is not active. Configured is not Active.
9. Verify Bank accounts & templates
Choose the source account, upload an .xlsx file, use its first worksheet, and
map at least unaccented recipient name, destination account, amount, and payment
reference. Save only after Preview shows the expected columns and order with
sensitive sample data masked.
Verify and hand off the change
- Sign in again with an account representing the affected role.
- Open the exact route and perform one safe read or trial action.
- Compare the visible result, denial message, and data scope.
- Record each area as Active, Not applicable, or Specialist action.
- Hand off the next action and owner to HR, payroll, network, or identity.
Result to confirm: the representative account opens only the areas it owns, the change affects the intended scope, and unrelated settings remain unchanged.
If a card, action, or result is missing, use Settings issues before changing another setting.