Time and attendance policies
Complete when a test employee has the correct pattern and shift, can use the correct leave type, receives the intended clock policy and produces a visible administration result.
Role and access: use an HR or time-policy administrator with access to the small test scope. A reviewer who cannot manage rules should receive the test result rather than broader configuration permission.
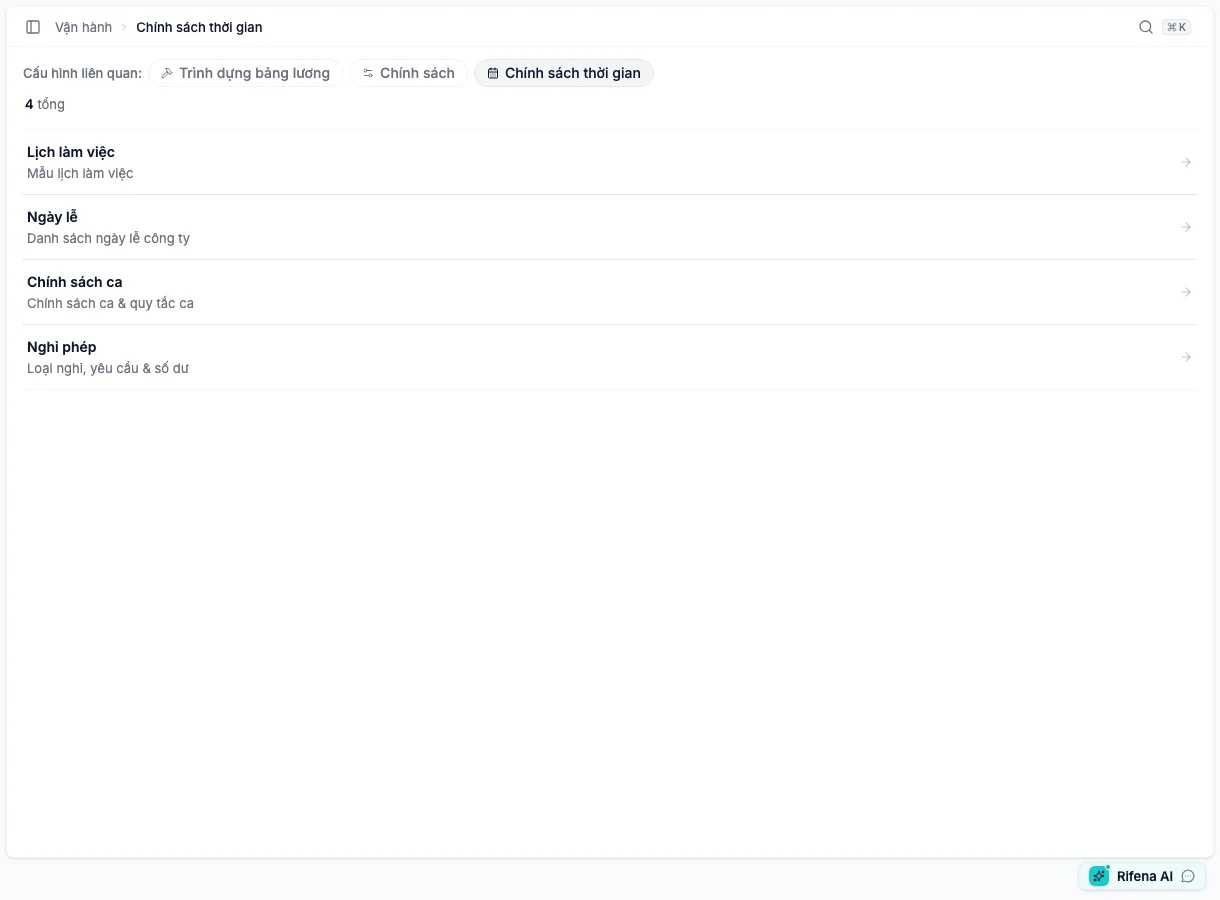
Product routes: /operations/time-policies opens Work patterns,
Holidays, Shift policies, and Leave;
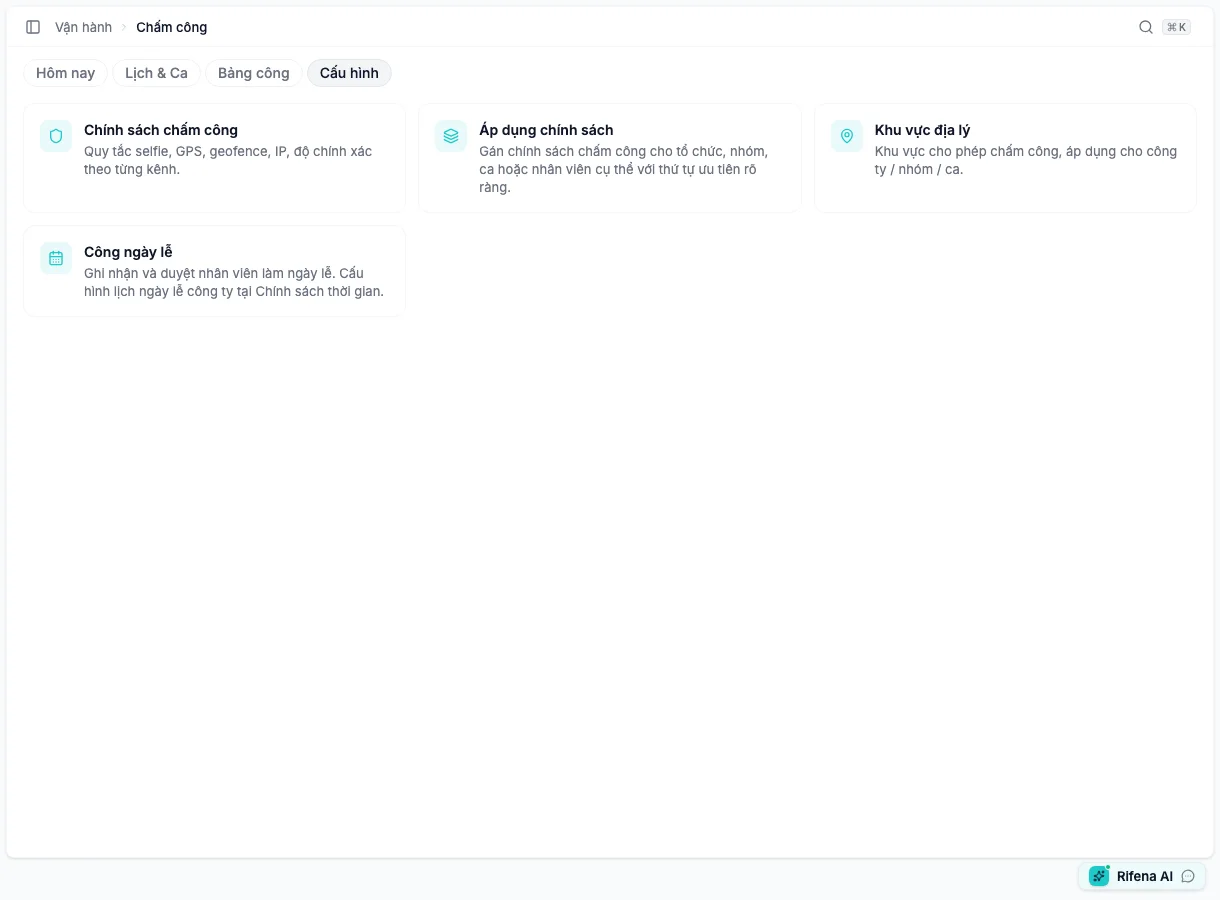
/operations/timekeeping?tab=config opens Settings with Attendance
policy, Clock assignments, Geo zones, and Holiday work. The direct
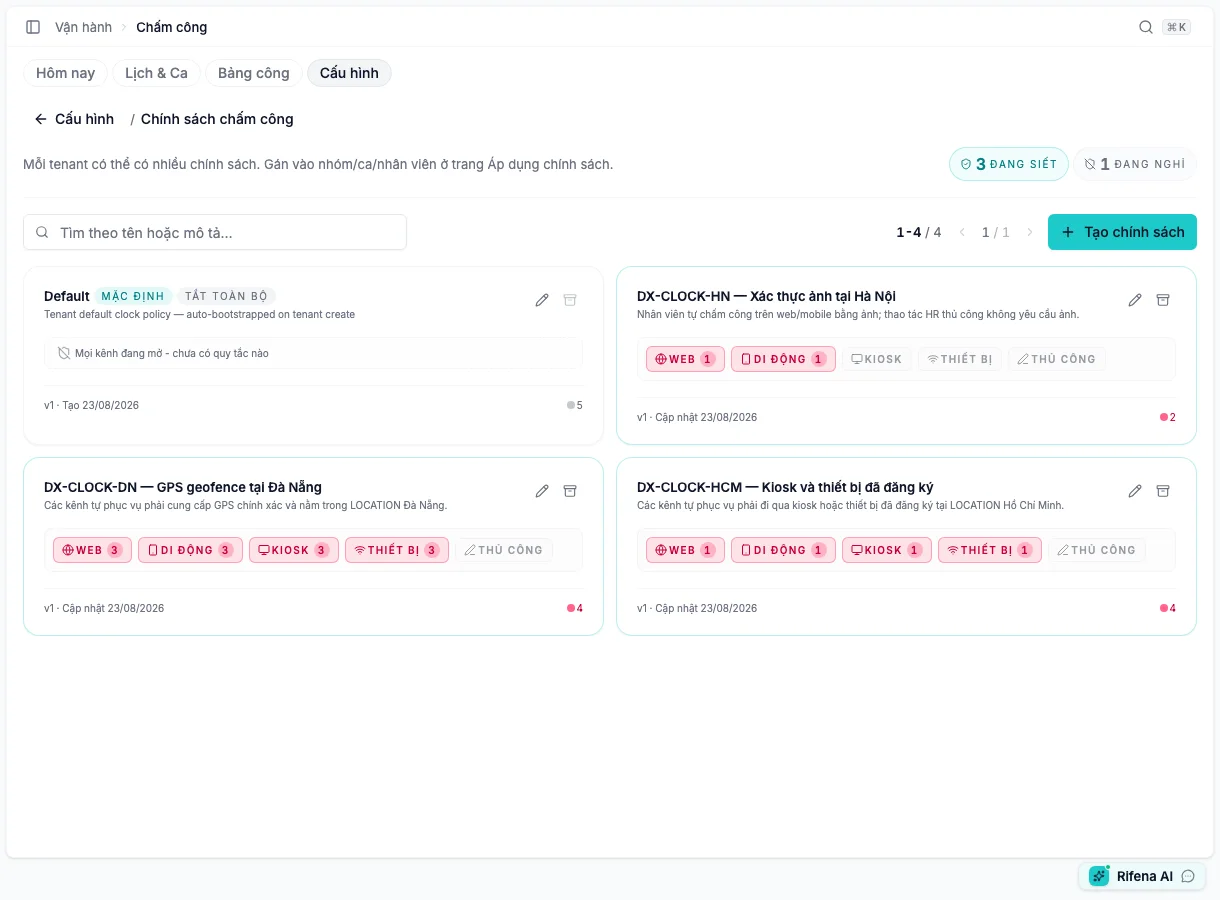
policy-list route is /operations/timekeeping?tab=config&detail=policy;
/settings/clock-policies opens the same panel as a compatibility route. Working
time and overtime limits live at /settings/labor-rules.
Recommended order
Work pattern → Holidays → Shift policy → Shift rules → Leave → Working-time and overtime limits → Clock policy → Assignment → Test
1. Create a work pattern
Screen: Operations → Time policies → Work patterns.
Create a pattern, select working days, add a description and make it default only when it is the common pattern. Save and reopen detail.
Expected result: correct working-day count and default state. Read impact before editing/deleting a pattern in use.
2. Prepare holidays
Screen: Operations → Time policies → Holidays.
Select year, copy the standard calendar or add manually, then verify date range, paid state, holiday-work multiplier, time-off-in-lieu rule and scope/exclusions.
Expected result: an active holiday becomes selectable in Holiday work.
3. Create shift policies and rules
Screen: Operations → Time policies → Shift policies.
On Shift policies, create a normal, overnight or split shift, enter times, scope and any justified multiplier/allowance. On Shift rules, configure overlaps, minimum rest, maximum shifts and early/late clock grace as Warn or Block.
Expected result: the test employee can be assigned an eligible shift under Operations → Timekeeping → Schedule → Shifts.
4. Configure leave
Screen: Operations → Time policies → Leave → Leave types.
Review paid/taxable, approval, attachment, calendar/working-day count, notice, maximum consecutive days and carry-over. Prepare a test balance when required.
Expected result: the employee sees the correct type and estimate in Employee portal.
5. Configure working-time and overtime limits
Screen: System → Settings → Labor law rules.
Apply the required working-time/overtime rules as Warn or Block. Legal value, source and effective date are system-managed.
6. Create a clock policy
Screen: Operations → Timekeeping → Settings → Attendance policy.
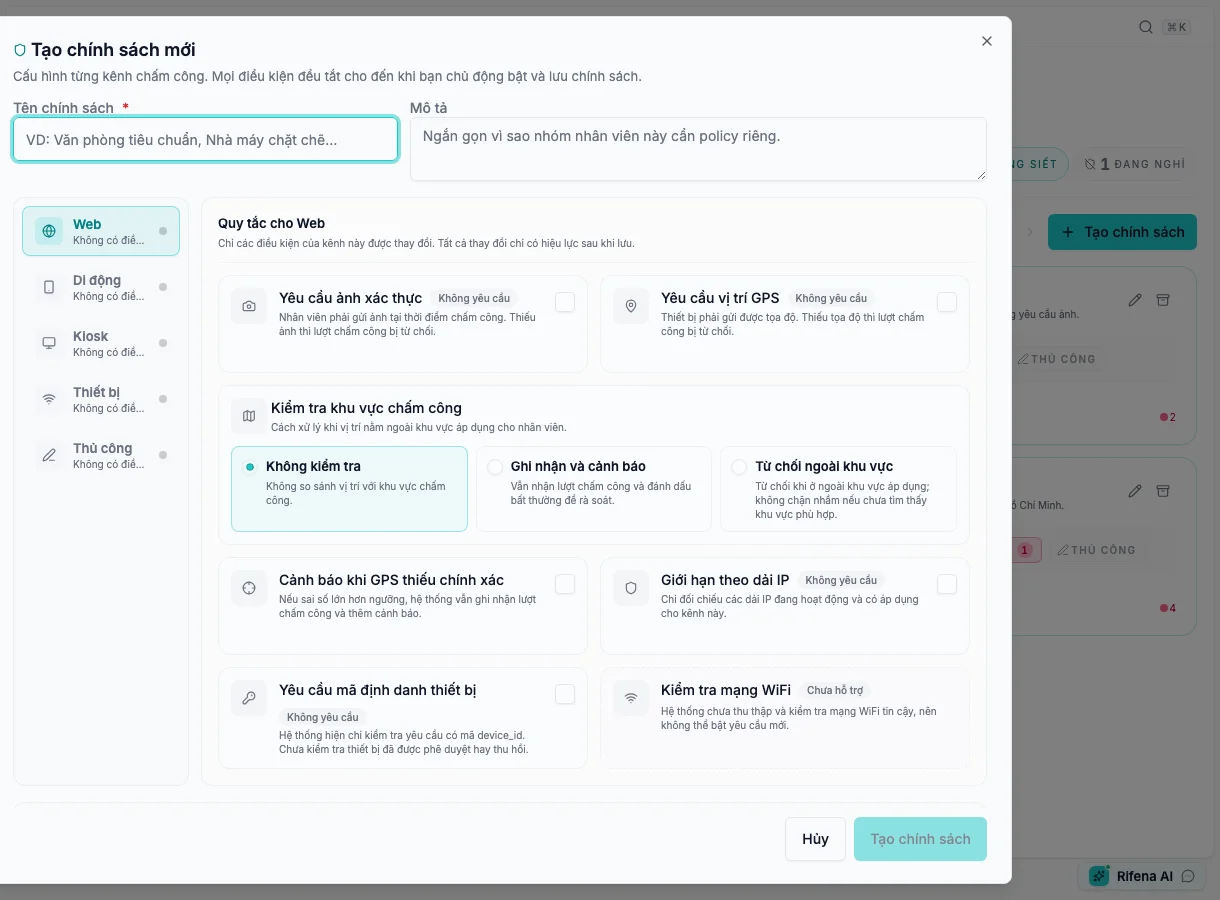
- Select Create policy. Every condition starts off; a new policy does not silently enforce a requirement.
- Enter a name and description that identify the intended group. The system Default policy name is locked when editing, while its rules remain editable with the required permission.
- Review Web, Mobile, Kiosk, Device, and Manual one by one. The marker next to a channel indicates configured conditions, not employee assignment.
- Apply the exact enforcement semantics for each channel:
- Require verification photo and Require GPS location reject an event when the evidence is missing;
- Check clocking area can be Do not check, Record and warn, or Reject outside area;
- Warn when GPS is inaccurate still records the event and flags it for review;
- Restrict by IP range should be enabled only after an active range applies to that channel;
- Require device identifier currently checks that
device_idis present; it does not approve or revoke a device.
- Check WiFi network is marked Not supported. Do not treat it as an active control or enable it for a new policy; clear a legacy value only after impact review.
- Read the channel and requirement summary before saving. Create/save is available only for valid data and a real change; closing a dirty dialog asks for discard confirmation.
- Save and reopen the policy to compare its card summary. Editing an existing policy creates its next version and preserves prior history.
Expected result: the list shows the intended channels and enforcing-rule counts, with no accidental requirement. Enable geofence, IP, or evidence checks only after the supporting data is ready and a representative account has tested it.
7. Create supporting data and assign
Geofence
Screen: Operations → Timekeeping → Settings → Geo zones. Set name, map centre, radius and scope; inspect preview.
IP allowlist
Screen: System → Settings → IP allowlist. Set CIDR, label and one or more of Web, Mobile, Kiosk, Device and Manual; selecting none means all sources. Use my IP is only a starting address and network administration must verify it. This list participates in clock checks; it does not restrict Rifena sign-in.
Policy assignment
Screen: Operations → Timekeeping → Settings → Clock assignments. Select policy, subject (organisation, group, shift, arrangement or employee), effective date and save. Review more-specific assignments that can take priority.
8. Test with a representative account
- Assign a shift to the test employee.
- Sign in as that employee and open Personal → Employee portal → Attendance.
- Verify photo/location/network requirements.
- Record one test event.
- As HR, reconcile it under Today and Timesheet.
- Submit sample leave and overtime; verify type, balance and approval route.
- Clean up test data or document retained evidence.
If blocked, check shift/pattern, policy assignment, browser permission, geofence and IP in that order. Do not loosen the entire organisation policy for one test case.
See Time policies, Timekeeping or Time and attendance issues.